Can You Lay Tile Over OSB Subfloor?
The subfloor is the layer of material that lies beneath the surface of a concrete slab. It is typically made out of wood, plywood, or OSB (oriented strand board).
Tile can be applied to the subfloor in two ways – it can be installed over the subfloor, or it can be laid over an existing subfloor. This article will show you what happens if you lay tile over the OSB subfloor.
If you lay tile over the OSB subfloor, it will create a dust problem for your home. There are other problems to consider as well – moisture and soundproofing issues.
Should You Put Tile Over OSB Subfloor?
A material called oriented strand board, also known as OSB, is composed of engineered wood compressed into multiple layers to form a single sheet. OSB is similar to plywood in that it is composed of engineered wood that has been compressed into multiple layers.
When it comes to putting down a subfloor, OSB is a great alternative for those who are looking to save money since it is not particularly expensive but can also do just the trick that builders, DIYers, and homeowners want when it comes to subfloors.
The OSB subfloor will work fine as a subfloor if you’re planning on installing tile beneath it or if you already have an OSB floor in that area. The tile cannot be installed directly onto the OSB subfloor since the thin-set will not adhere to the resin used to hold OSB together during installation.
To make sure the thin-set adheres easily to the OSB subfloor, you need to install a membrane between the tile and the subfloor. In order to guarantee that there is no movement from beneath, the tiles must have a strong bond with the material underneath.
Your tiles will stay put if they are properly bonded and will be less likely to move over time. Some may be tempted to install their tile directly on top of their OSB subfloor without installing a membrane.
You may save yourself some time and money in the short run, but you’ll be paying for it in the long run. This subfloor isn’t strong enough to support tile in a way that keeps it from warping or cracking either, as the thin-set will not bond to OSB properly, so the tiles will move and break.
What Will Happen If You Lay Tile Over OSB Subfloor?
Installing OSB directly to the roof is not the way to go. This is because, while there isn’t a governing or guiding agency that prohibits it, this installation method can result in a number of negative consequences.
The thin-set that is applied to OSB must bond with wood strands or wood chips as well as the resin or binder that holds the chips together.
The bond between the OSB and the floor is not strong enough to withstand the stresses of a direct installation. It is recommended to use battens or single-layer underlayment.
In such cases, a Ditra membrane can be used as a barrier. This will act as a link between the tiles and the OSB.
That is because, if you lay tile over the OSB subfloor, it will eventually warp and crack. A standard floor is made of plywood and resilient tiles that are bonded together with a layer of polyethylene (PE) or polyurethane (PU).
When you lay tile over the OSB subfloor, the PE or PU layer will warp and crack. If you need to install tile on the OSB subfloor, install a layer of plywood first as a base.
Reasons To Lay Tile Over OSB Subfloor
Tile is a good flooring that can be installed over the OSB subfloor. If you’re looking to add a new floor to an existing home, there are some factors you should consider before choosing the surface.
Tile is a durable and attractive option that can be installed in many types of building materials, from laminated beams to OSB subfloors. In this section, we will discuss the benefits of laying tile over the OSB subfloor.
- Reduce your finishing costs-tile is a more affordable option than wood, stone, or other hard surfaces.
- Improve the appearance of the space-the tile allows for a more cohesive look throughout your home or office.
- Increases durability-tile can be easier to clean and maintain than other flooring options that have been installed over OSB subfloors in the past.
- Increase thermal insulation-the tile has an R-value 30% higher than oak and other hardwoods commonly used for flooring in homes and offices.
- It is also an excellent conductor of heat and noise reduction material at 25%.
How to Properly Install Tile Flooring Over OSB Subfloor
OSB is a great material that can be used in so many different ways that you will not have trouble finding a use for it. This is great news for anyone who wants to install a new tile on a pre-existing OSB subfloor or has purchased OSB for the project.
Let’s take a look at what tools you’ll need and how your installation will be prepared now that you know OSB will work as the subfloor beneath the tile.
Tools You Will Need To Install Tile Flooring Over OSB
In terms of the tools, you require for installing tile over OSB subfloors, they are quite a few. Make sure, however, that your installation will run smoothly without any interruptions, and that you have any necessary tools before you start.
Whenever you are working on a project that has a deadline, always keep your tools within your reach or close to you so you don’t have to step too far away. You will also need a utility knife, spray bottles, trowels, rubber floats, levels, a power drill, and a bucket with a lid.
These tools may not all be needed, depending on your particular project, but they all serve a helpful purpose and can come in handy when needed. Additionally, you will need a few types of materials to ensure that the installation goes as smoothly as possible.
Aside from enough membrane to cover the area you intend to tile, you will also need a thin-set fortified with latex or without latex, grout sealer, and, of course, grout. If you are reinstalling the baseboards after the tiles have been set, you will need to use screws or nails to reinstall these pieces.
Preparation Process
Whenever you are tiling, one of the most important factors to consider is the levelness of the floor. In light of this, when you are preparing an area to lay tile, it is very important that the floor within that area be level. By sliding a 4-foot to 6-foot straight edge all the way around the room to see if it lays flat in any part of the room, you can check for any dips in the floor. It is also possible to use a leveler to be as precise as possible with this.
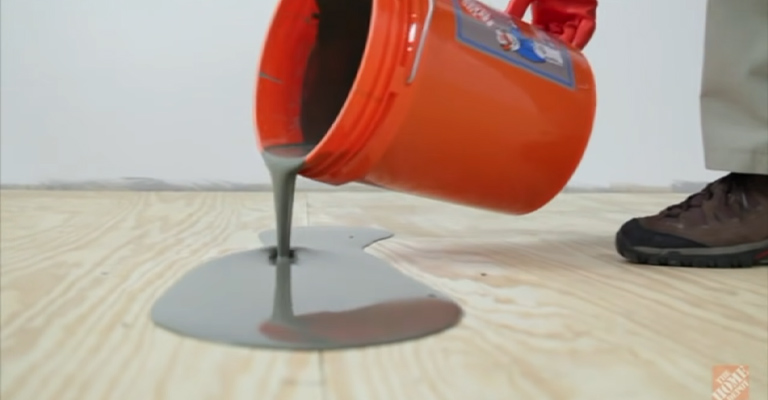
In addition to ensuring that the floor is level, make sure to look for any rough, raised, or uneven spots on the OSB subfloor. Although they may seem insignificant, these small details can have a big impact on how well the tile lays. Then, sand the sanded spots and apply the thin-set adhesive fortified with latex, then set the membrane on top.
Installing
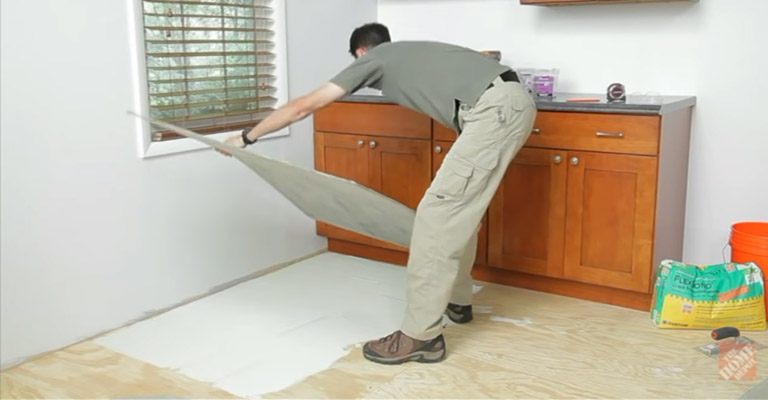
Having applied a thin-set to the entire area and then applied a membrane, you will then apply a thin-set bed that does not contain latex additives and then set the tile in the bed. Your tiles will remain in place thanks to the bond created by this process.
Using a rubber float, you will apply the grout to the joints after the tiles have dried. Upon setting the grout, you will then seal it with a grout sealer. This will protect the grout from stains.
Special Cases
Handling porcelain or ceramic tiles can be quite delicate, even though they are highly durable once installed. While transferring the tiles, keep them as flat as possible and avoid putting any weight on them, as this may cause them to crack because of their unstable nature.
Then, store them between 65- and 80-degrees Fahrenheit once they arrive at their destination. It is very important to seal the grout that you use for your porcelain or ceramic tile in order to keep them as clean as possible.
It is important to choose a seal that suits the needs of the space but also prevents stains from penetrating through. In most cases, the tiles do not require sealing, as the stain-resistant coating is applied when they are manufactured.
When cleaning ceramic or porcelain tiles, make sure to dust and sweeten the surface regularly in order to prevent buildup. Also, use warm water or neutral cleaning agents to clean the tile and grout while using a cloth or sponge that is non-abrasive. The grout should not be stained by normal household cleaners because they can degrade the sealant applied to the ground.
Final Words
For many homeowners, the installation of a new flooring system is a complicated and time-consuming process. However, if you decide to go with tile or some other hard surface such as hardwood or stone, it helps to ensure that your new flooring will last longer and stay more resistant to damage.
When installing tiles, especially porcelain tile, on a subfloor, the foundational elements such as floor joists and the material beneath the tiles are pivotal in ensuring longevity and durability. OSB panels are a popular choice, but they have their nuances. While they can serve as a base, it’s recommended to have an intermediary layer like a cement board. This not only ensures that the tiles bond properly but also reduces the chances of cracking grout down the line.
In the world of tile installation, shortcuts often lead to future issues, such as tiles failing to adhere correctly, or worse, visible problems on the finished surface. Before diving into a project, always ensure the old floor and foundational structures, like floor joists, are sound and suitable for the task. Whether you’re undoing, redoing, or drafting your plans from a table, remember that the successful bonding of tiles often depends on the material beneath, making choices like cement board over OSB panels invaluable in the long run.

