How To Remove Front Cover Of Window Air Conditioner?
During summer, you can’t do without your window AC. But, in order to improve its efficiency, you must clean it regularly and perform routine maintenance on it. Let’s be honest, though.
There’s nothing fun about working with window air conditioners. Since many of them are big and awkward, they feel heavier than that, even though they weigh over fifty pounds.
There are two covers on your window air conditioner that protect the internal mechanisms. Besides protecting the air filter, the front cover also protects the air conditioner’s front. You can see this part of the unit in the room.
To clean the window AC, you must first remove the front cover so that you can access the filter. Unfortunately, it isn’t appealing for most of us to remove the top cover or remove their parts.
Air conditioners have an outside cover, or case, that protects all of their internal components. It depends on the manufacturer whether or not the front cover has securing screws. While the outside cover attaches relatively similarly, the inside cover does not.
What is the best way to remove the front cover of the window air conditioner? It might seem complicated at first if you are unfamiliar with the job. The good news is that removing some parts of your air conditioner doesn’t require you to be an HVAC expert.
What Is The Purpose Of Removing The Front Cover Of Your Window Air Conditioner?
It is common for people to clean their air conditioner’s front cover by opening it. In addition to impacting indoor air quality and energy consumption, dirty air conditioners can cause a thousand and one problems.
The air conditioner can also be cleaned without removing it, but it might not yield the desired results due to the difficulty in cleaning some areas. There is also a possibility that you will touch areas that don’t need water.
The cover should be removed prior to cleaning to ensure thorough cleaning and removal of particles. It may also be necessary to remove the front cover if you want to check the condition of your air conditioner, replace a part, or replace the entire unit.
How To Remove The Front Cover Of A Window Air Conditioner | Step By Step Guide
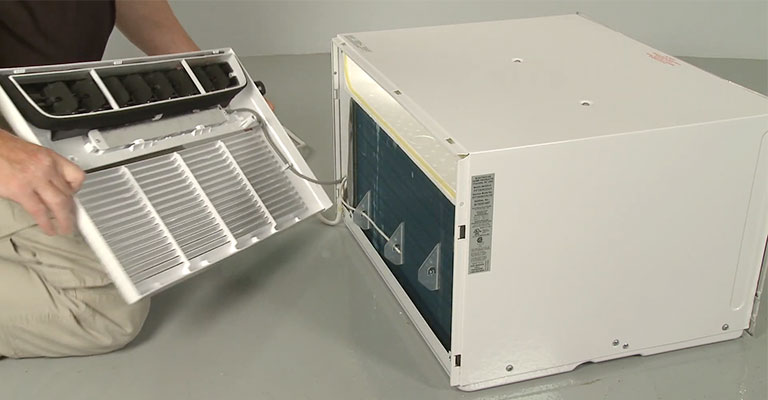
I admit that it is a bit difficult to verbally explain how to remove your window air conditioner’s front cover. Getting your unit’s instruction manual is the first step.
Detailed instructions on removing the window AC’s front cover can be found here more than anywhere else. It is now time for you to begin the job once you have the manual and the tools you need.
Find out where the front screws are located by consulting the manual. An air conditioner’s front cover is usually connected to the unit by two screws. By researching your AC unit’s model name online, you may be able to find the screws if you find it hard to locate them.
Window AC Cleaning Tools
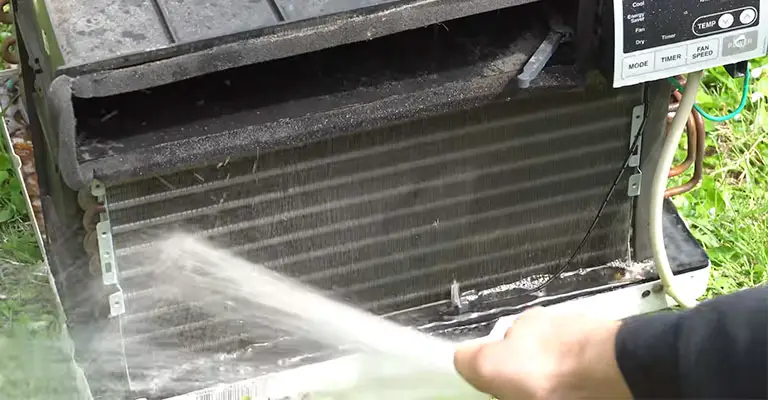
You can clean your window AC using everyday items that are lying around your house if it is only slightly dusty. However, when cleaning the back of your unit, things can get a bit tricky, so you will need some specialized cleaning products.
If you want to clean the blades and coils of this particular AC style, you should use a foaming cleanser. The fins can also be cleaned with a nylon brush. However, it is important to remember that most household brushes are not designed for this purpose.
When performing maintenance work, you’ll also need a fin comb. Fins outside the house can get damaged, and a fin comb set can straighten them out for you. A set of brushes for every pin per inch can also be purchased if you want to cover more systems with just one tool.
Step 1
Ensure that the air conditioner is turned off and disconnected from the outlet to avoid fire hazards. Also, I want to remind you that window air conditioners can be quite dangerous. If not unplugged during maintenance, they can cause electrical shock.
Step 2
The screws around the knob should be easily accessible after it has been dismantled. In order to avoid any injuries while unscrewing, you should wear gloves.
Simply hold your front panel firmly and slowly unhook it if it doesn’t have screws. Be careful not to break anything by pulling too hard.
Step 3
Towels or polythene bags can be placed on the floor where you will place the cover and remove any other parts. Ensure there is enough space for the entire AC.
Step 4
You will need your screwdriver to pull the AC cord, and you will need to step firmly on it. It would be helpful if a helping hand held the cord firmly for you. If the cord is long enough, it would be best to attach it to something more robust.
Step 5
We have now reached the central part of the project. You should start unscrewing the screws from one side and work your way around. What is the reason again?
The AC can lose its stability and fall off more easily by weakening both sides at once. However, when you concentrate on one side, the AC will still be attached to the other side, and you will still be in control.
Step 6
Having unscrewed the first side, you can slide the unit over to the side that remains unscrewed and secures the next side with your hand. It’s almost time to take the air conditioner apart this time.
Keep the AC balanced and stable by extending your other hand through the gap on the side.
Once you’ve secured a firm grip, unscrew the remaining screws with your other hand. Don’t let go of the AC no matter what.
Step 7
You can remove the cover once you’ve unscrewed the AC with one hand while tightly holding it with the other.
In this situation, you must realize that your hand and your window are the only two things holding the box together, and realistically, the window is no longer reliable. Therefore, place your waiting towel on the cover using the unscrewing hand.
Step 8
Especially if your window is high up, this is the most important step. Flex your arm a little and lift your air conditioner with one hand while holding onto the back. Then, open the window with the other hand.
Keep your cool even if it looks like it is going to topple over. Try to adjust it until it is balanced with your free hand.
Step 9
Bend low enough to carry the AC comfortably and go easy on the cord beneath your feet. Place the AC on the towel below and move it firmly. Closing the window and removing any hardware that could have been used to hold the AC in place are the next steps.
Safety Tips:
It is important to take good care of your air conditioner in order to keep it running for a long time. The good news is that well-maintained air conditioners can last longer than ten years, especially the big ones.
Below are some quick tips and tricks for making the most of your air conditioner:
- Rather than overworking your AC, cool your home with other natural methods. It improves the AC’s lifespan and reduces the risk of damage.
- Keep the air conditioner on for a few hours each day to prevent mold build-up.
- If you’re unsure what to do, don’t change anything on your AC. Instead, get it done by a professional.
- Make sure the unit is placed in the shade; if it doesn’t have a cover, get one to protect it. It increases the lifespan if it is shaded or covered.
- To ensure free and clean indoor air circulation, clean the air filters more often (once a month or as needed).
- Make sure the fins are straightened after a thorough cleaning to permit up and down movement that promotes proper cooling.
Final Words
The performance of your air conditioner can degrade after some time, just like other major appliances in your home. The filter can become clogged, the unit becomes dirty, and the unit’s general efficiency decreases as a result.
It is completely natural, so you do not need to worry about it. It only needs a little care and attention for your window AC to shine like new again.


