Understanding and Addressing Cracks in Ceiling
When it comes to home maintenance, one common yet often overlooked issue is the presence of ceiling cracks. While they might seem minor, cracks in the ceiling can be indicative of deeper structural problems or simply cosmetic issues.
This comprehensive guide aims to provide homeowners with essential insights into the causes, implications, and solutions for ceiling cracks, ensuring your home remains both safe and aesthetically pleasing.
What Causes Cracks in Ceilings?
Understanding the root causes of ceiling cracks is essential for effective diagnosis and repair. Various factors, ranging from natural house aging to environmental influences, can lead to these cracks. Here’s a closer look at each of these causes:
1. Structural Movement and Settling
One of the most common causes of ceiling cracks is the natural settling of a house over time. As a house ages, it gradually sinks into its foundation, leading to minor shifts in the structure.
- Impact of Environmental Conditions: Changes in humidity and temperature also cause building materials to expand and contract. This constant movement can create stress on the ceilings, resulting in cracks.
- Differential Settling: Different parts of a house can settle at varying rates, especially if the foundation is uneven or built on varying soil types. This uneven settling can cause significant stress on the structural components, leading to cracks.
2. Water Damage
Water infiltration from leaks in the roof or upper-floor plumbing problems is a major culprit.
- Roof Leaks: Damaged shingles or compromised roofing materials can allow water to seep into the attic and ceiling areas, weakening the structural materials and causing cracks.
- Plumbing Issues: Similarly, leaking pipes or issues with bathroom fixtures on upper floors can lead to water accumulation in ceiling spaces.
3. Poor Workmanship or Materials
The quality of construction plays a significant role in the longevity and stability of a house.
- Substandard Materials: Using inferior building materials can lead to premature deterioration, including the formation of cracks.
- Flawed Installation: Incorrect installation techniques, especially concerning drywall and plaster, can result in weak points that eventually crack under normal house movement.
4. Excessive Weight
Overloading the attic or upper floors can exert undue stress on the ceiling.
- Heavy Storage: Storing heavy items in the attic can strain the ceiling joists, leading to cracking.
- Structural Modifications: Removing walls or making changes to the home layout without proper support can redistribute weight in ways the original design did not anticipate, resulting in cracks.
5. Age of the House
The age of the property is a natural factor. Over time, materials degrade and may become more prone to cracking.
- Drying and Shrinking: Materials like wood and plaster can dry out and shrink over time, leading to gaps and cracks.
- Wear and Tear: General wear and tear from decades of use can weaken the structural integrity, making ceilings more susceptible to cracking.
6. Seismic Activity and Ground Movement
In areas prone to earthquakes or significant ground movement, the stress on the building can lead to ceiling cracks.
- Earthquakes: Even minor seismic events can create enough movement in a building to cause cracks.
- Soil Shifts: Changes in the soil, whether due to moisture levels or geological shifts, can affect the foundation and, in turn, cause ceiling cracks.
Types of Ceiling Cracks
Ceiling cracks can vary significantly in appearance, each type indicating a different cause and level of concern. Understanding these variations is key to identifying potential underlying issues and determining the appropriate course of action. Here’s a closer look at the common types of ceiling cracks:
1. Hairline Cracks
These are thin, superficial cracks that often appear in ceilings. They are usually less than 1/16 inch wide and are the most common type of ceiling cracks in homes.
- Causes: Hairline cracks are often caused by the natural settling of the house or minor temperature and humidity changes. They can also appear at drywall seams due to slight movements.
- Implications: Generally, hairline cracks are not a sign of structural problems and are more of a cosmetic issue.
2. Spiderweb Cracks
As the name suggests, these cracks have a pattern resembling a spider web, with a series of small cracks branching out from a central point.
- Causes: They can be caused by minor settling or vibrations within the structure. In some cases, they are due to the application of a heavy paint layer that shrinks and cracks over time.
- Implications: Spiderweb cracks are usually not indicative of serious structural issues, but they can be unsightly.
3. Straight Line Cracks
These cracks are typically found along the seams where drywall panels meet. They are usually straight and can run either vertically or horizontally.
- Causes: They often result from improper taping or insufficient securing of the drywall panels during installation. Temperature fluctuations can also contribute to this type of cracking.
- Implications: Straight line cracks can sometimes be more than cosmetic, especially if they widen or are accompanied by other signs of movement.
4. Large, Jagged Cracks
These are wider and more irregular cracks that can be of significant concern. They can vary in width but are typically larger than the hairline or spiderweb types.
- Causes: Large, jagged cracks can indicate serious structural issues, such as foundation settling, structural damage, or significant shifting of the house.
- Implications: These types of cracks should be inspected by a professional as they can point to major structural concerns that might require immediate attention.
5. Discoloration with Cracks
Sometimes, cracks can be accompanied by discoloration or staining.
- Causes: This combination often indicates water damage, where the moisture not only causes the ceiling material to crack but also leads to mold or mildew growth, or rust in case of metal components.
- Implications: Cracks with discoloration should be investigated promptly to address potential water leaks and prevent further damage.
When to Be Concerned
While many ceiling cracks are simply cosmetic, certain signs warrant professional attention:
- Cracks that are wider than 1/4 inch.
- Cracks that run across the ceiling and down a wall.
- Cracks accompanied by sagging.
- Rapidly expanding cracks.
DIY vs. Professional Repair
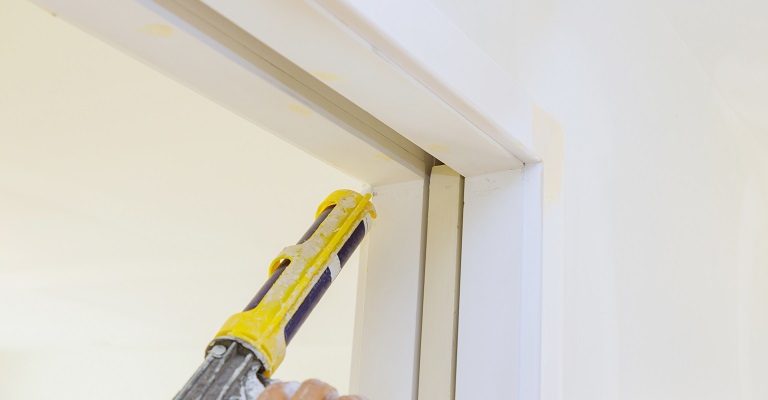
For small, hairline cracks, DIY solutions like caulking or spackling can be effective. However, for larger, more serious cracks, especially those suggesting structural issues, it’s crucial to consult a professional. They can assess the underlying cause and suggest the best course of action.
Preventive Measures
To minimize the risk of ceiling cracks:
- Regularly inspect and maintain your roof and plumbing to prevent leaks.
- Avoid storing heavy items in the attic.
- Ensure proper ventilation to reduce humidity fluctuations.
Advanced Repair Techniques
Tape and Joint Compound
For larger cracks, use a mesh tape and apply a joint compound. This method provides a more durable repair, especially for cracks due to structural movement.
Plaster Repair
In older homes with plaster ceilings, special plaster washers can be used to reattach the plaster to the lath, followed by patching the cracks.
Painting Techniques
Use a thick, high-quality paint to help hide minor imperfections after repairing cracks. Textured paints can be particularly effective.
Understanding the Aesthetics
Ceiling Textures
Sometimes, adding texture to your ceiling can not only disguise repairs but also add a decorative element to the room.
Lighting Considerations
The way light hits the ceiling can accentuate or hide imperfections. Consider the placement of light fixtures to minimize the appearance of cracks.
Long-Term Solutions
Addressing Root Causes
If cracks recur, it may be necessary to address underlying issues, such as foundation problems or significant structural defects.
Upgrading Materials
In some cases, upgrading the materials used in your ceiling (like switching from drywall to a more flexible material) can prevent future cracks.
Safety Concerns
1. Asbestos Awareness in Older Homes
Homes built before the 1980s might have asbestos in ceiling materials, especially in textured paint or “popcorn” ceilings. Asbestos is hazardous when disturbed, as it can release fibers into the air that are harmful when inhaled.
- Professional Assessment: If your home falls into this age category and you’re planning any ceiling work, it’s crucial to have a professional asbestos inspection. This is particularly important before scraping or sanding ceilings.
- Safe Removal: Should asbestos be present, its removal is not a DIY job. Hire certified professionals to handle the removal safely and in compliance with local regulations.
2. Lead Paint Considerations
Similar to asbestos, lead-based paint was common in older homes. Disturbing lead paint can release toxic lead dust.
- Testing for Lead: If your home was painted before 1978, consider testing for lead paint before undertaking any renovation work that disturbs paint layers.
- Safety Protocols: Use protective gear and follow EPA guidelines for lead-safe practices if lead paint is present.
3. Structural Safety and Integrity
Ceiling cracks can sometimes signal deeper structural issues. It’s essential to understand the extent of these potential problems.
- Regular Inspections: Have your home inspected regularly by a structural engineer, especially if you notice widening or multiplying cracks. This is crucial in areas prone to environmental stressors, such as earthquakes, heavy snow loads, or extreme weather.
- Professional Repairs: Engage a qualified contractor for repairs if structural issues are identified. They can ensure that repairs not only fix the cosmetic issues but also address any underlying structural concerns.
4. Personal Safety During Repairs
If you decide to tackle minor repairs yourself, prioritize personal safety.
- Proper Equipment: Use ladders safely and wear protective gear, like goggles and masks, especially when sanding or dealing with potentially hazardous materials.
- Knowledge of Techniques: Ensure you’re knowledgeable about the repair techniques and materials. Incorrect repair methods can worsen the problem and may lead to more significant safety issues down the line.
5. Electrical and Plumbing Considerations
Sometimes, ceiling cracks can be near electrical wiring or plumbing. Tampering with these can lead to serious hazards.
- Consult Professionals: Before starting any repair near electrical fixtures or plumbing lines, it’s wise to consult with an electrician or plumber to avoid any mishaps.
Further Tips and Insights
Monitoring
Keep an eye on existing cracks. If they change – whether in length, width, or direction – it’s a sign to investigate further.
Professional Inspection
If unsure about a crack, a structural engineer or qualified contractor can offer peace of mind with a thorough inspection.
Regular Maintenance
Conducting regular checks on potential sources of damage, like the roofing or plumbing system, can preempt ceiling cracks.
Understanding Home Insurance
Some causes of ceiling cracks, especially those related to structural damage, might be covered under your home insurance policy. It’s worth checking your coverage.
Frequently Asked Questions (FAQs)
Q: Are ceiling cracks a sign of a serious problem?
A: Not always. While some cracks can indicate structural issues, many are simply cosmetic. It’s important to monitor the size and pattern of the cracks to determine if they’re worsening.
Q: Can I repair ceiling cracks myself?
A: For minor, hairline cracks, DIY repair is possible using spackling or joint compound. However, for larger or more serious cracks, especially those that may indicate structural problems, it’s advisable to seek professional help.
Q: How can I prevent ceiling cracks?
A: Regular home maintenance is key. This includes checking for roof leaks, ensuring proper attic ventilation, and avoiding excessive weight in your attic. Also, controlling indoor humidity levels can help reduce structural movement caused by temperature and humidity changes.
Q: Should I repaint my ceiling after repairing cracks?
A: Yes, repainting is recommended to ensure a uniform appearance. After repairing and sanding the cracks, apply a primer followed by your choice of ceiling paint.
Q: When should I be worried about a ceiling crack?
A: If you notice cracks wider than 1/4 inch, cracks running across the ceiling and down the wall, or cracks accompanied by sagging or signs of water damage, it’s time to consult a professional.
Final Thoughts
Not all ceiling cracks signify a dire issue. Small ceiling cracks, especially those like straight ceiling cracks along drywall joints, are often cosmetic and can be easily remedied with drywall mud and tape. However, when encountering discolored ceiling cracks or a cracked ceiling with more pronounced features, it’s crucial to delve deeper. Large cracks, particularly those in a bowed ceiling or accompanied by bowed walls, might indicate more serious structural concerns.
In such instances, consulting a foundation repair contractor is a wise decision. They can assess whether these signs point towards foundational issues needing professional intervention. Moreover, it’s important to recognize that ceiling cracks accompanied by other symptoms, such as uneven floors or a discolored crack, require immediate attention. Homeowners should not overlook these warning signs, as they could point to underlying structural damage.
A foundation repair specialist can provide an in-depth evaluation and suggest appropriate measures, which might include reinforcing drywall joints with a stronger drywall compound or undertaking significant repairs. Remember, proactive maintenance and timely intervention are key in preserving the structural integrity and safety of your home, ensuring that living spaces remain secure and aesthetically pleasing.


