How Do You Add Ducts To An Existing Duct?
Rather than asking how; what you should be asking is that if it’s possible to add ducts to an existing duct. If your system is larger than your current needs, you could consider it. You should not consider it if the equipment is already operating at maximum capacity.
Adding a vent to existing ductwork is fairly straightforward. Nevertheless, make sure the heater and air conditioner are compatible. Then mark the areas where the heater and air conditioner will go. When you have ensured the right fit, cut the piece and attach the vent cover. Last but not least, drill the holes and attach the vent to the wall.
Obviously, there are other factors to consider, but that is the main one. Choosing this option would seem the logical choice. There are, however, some issues as well.
An intelligent homeowner would hire HVAC experts to inspect and calculate the amount of additional space the HVAC system can handle based on the number of ducts, vents, and ductwork plugged in.
How To Add Ducts To Existing Duct
With our pros and cons outlined, you’ll be able to decide if adding vents is beneficial. The fact that you have made it here means you are interested in knowing the simple steps.
I just want to let you know that there is one thing to consider before you begin the installation process. How do you know? I guess you will have to check if your heater and air conditioning can handle another vent.
There are only a few steps to follow, fortunately. Following the right steps is easy for anyone. Following the steps clearly will result in an accurate and timely outcome. Let’s get started.
Step 1:
Don’t start working until you have worn protective gear. Therefore, you will need to wear a face mask, goggles, and gloves. You’re all set to go once you’ve worn them.

The first thing you need to do is identify where you want to add the vent in relation to the existing duct board. After you have located the vent, you need to lock it in place with a marker.
Step 2:
Once you have located the location on the existing duct, you can start cutting. How do you do that? In any case, you’ll have to use the metal shears and the drill. Use these tools to cut precisely where you need it.
Make sure that the vent cover is measured after this. In this case, this determines where you’ll install the vents. Mark the area where you will cut with the marker.
Since the metal shears will need to fit inside the sheet, make the hole big enough. What’s the point? If the hole was bigger, the shears would fit easily.
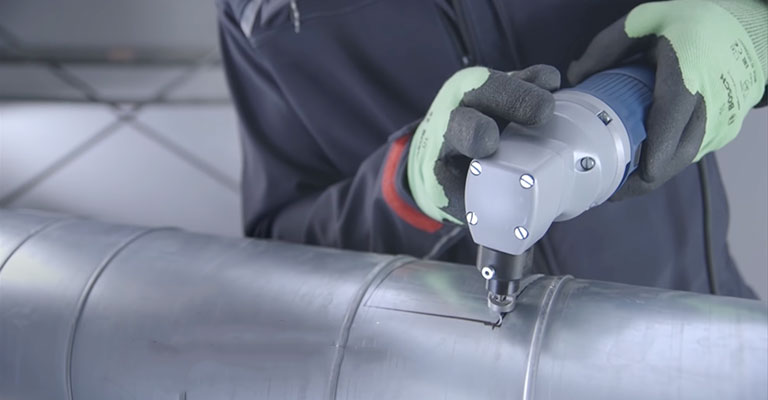
Make sure that you are familiar with how to use shears or tin snips for cutting metal before you start using the tools.
In addition, it will permit the cutting of the template with greater flexibility. You will be able to follow the hole to cut easily. This hole was originally made on the vent cover.
Step 3:
The template has been cut using the traced hole as a guide. Place the vent in place. Hold the vent up against the hole to ensure that it fits perfectly.
In this case, the hole size should be the same as the vent size. A large hole makes the vent impossible to fit through, mainly because the vent will not be able to fit in comfortably. As a result, installation becomes quite challenging.
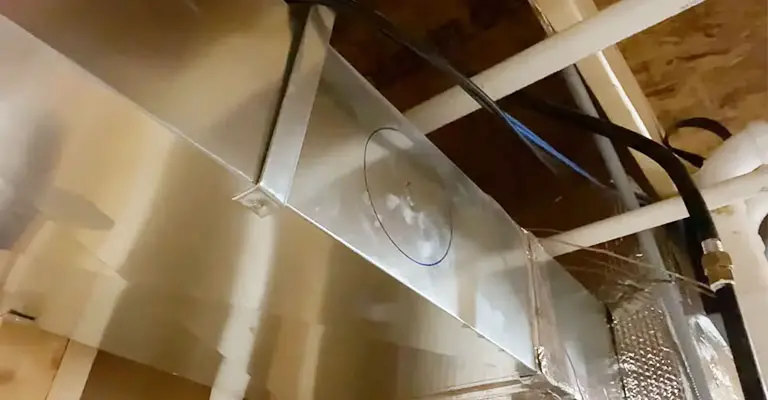
Therefore, ensure the right size of the vent by holding it up. The vent edges will not be able to have any extra room. Even though the edges of the tile can be filled by caulking, the vents will still not fit tightly. Therefore, sizing correctly is important.
Step 4:
Once you’ve marked the hole, make sure the vent fits properly. The next step is to cut the insulation. Make sure that any insulation covering the mark is cut off. Using a scissor would work just fine for cutting the insulation.
Be careful, though, to not go overboard when cutting the insulation. It’s best to leave a little insulation around the edge.
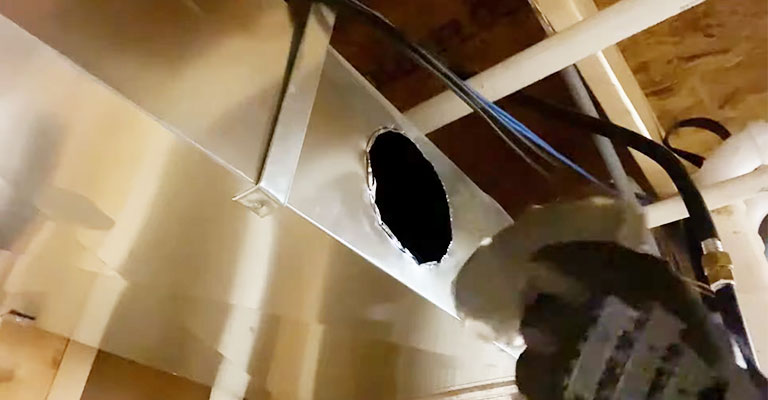
After cutting the insulation, open the vent and check its fit again. The reason for this is that cutting the insulation can slightly alter the overall fit of the vent.
Step 5:
Having checked the fitting of the vent one more time, we are ready to move on. We will mark the hole locations for the screws. Using a power drill, you can then drill them after marking them out.
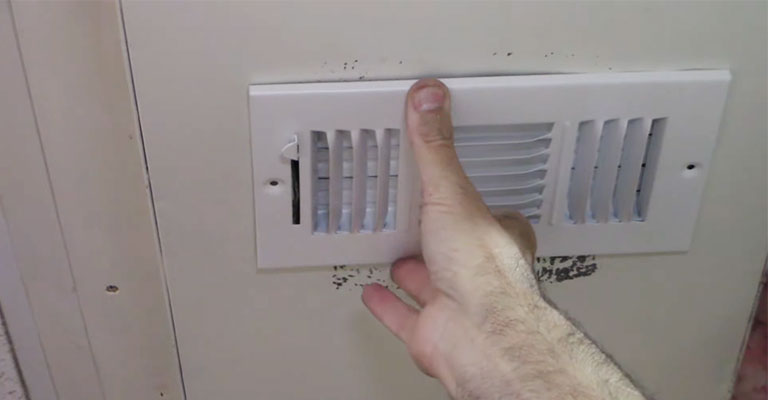
When you use the power drill, however, you’ll need to be careful. This is because you should drill slowly and watch where the vents are when drilling. By doing so, you will not drill too deep.
Step 6:
Install the duct nuts and finally screw the vent on. You may need to use a driver for this step. By inserting the nuts with a driver, you can ensure that they are tightened properly.
Furthermore, you can fill in any gaps with walls to ensure that the vent fits tightly. In the end, screws and tight-fitting vents are what make the difference.
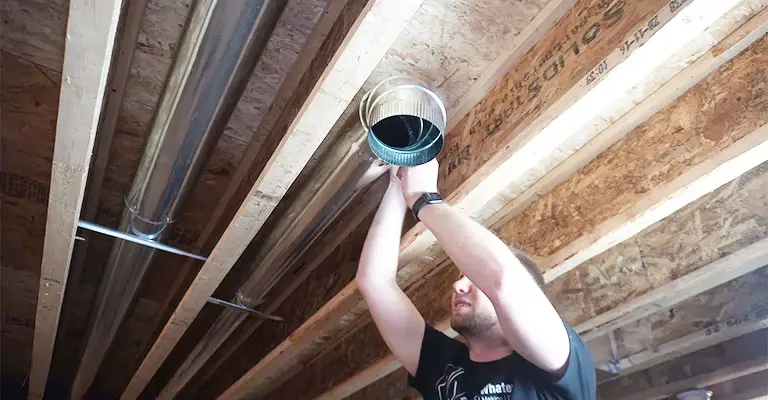
Adding Vent to Existing Ductwork
Before you determine whether or not you should add vents to your existing ductwork, think about whether it’s worth your time.
Adding them without a reason is not a good idea. The idea of adding a vent seems to have some pros and cons. Let’s take a look at them first.
The Advantages
It is possible to increase the resale value of your home by adding vents to your ductwork. Although you will have to spend more on your house’s furnishing if these vents are made. As a result, the vents definitely contribute to profits.
Furthermore, the system is supplied with fresh air by vents. Pollutants and toxins are pushed out through the circulated fresh air. Therefore, the air quality in the home improves. There are even health benefits.
The Disadvantages
Vents installed in existing ductwork reduce their efficiency, and this is the biggest con. In this case, adding that vent will reduce the overall efficiency of the room.
Exactly how is the efficiency of the room deducted? Your utility bills will go up as a result. Thus, the savings on electricity will not be possible.
Can My HVAC System Handle More Ducts?
Here’s when tapping existing ductwork to heat and cool a finished basement, garage converted to an attic, a freshly built addition, or a poorly heated room at home is acceptable.
That’s unlikely to be the case! Unless the additional space is a small one, if it was correctly sized when installed for your home, the current heating and air conditioning system may not adequately serve the additional space.
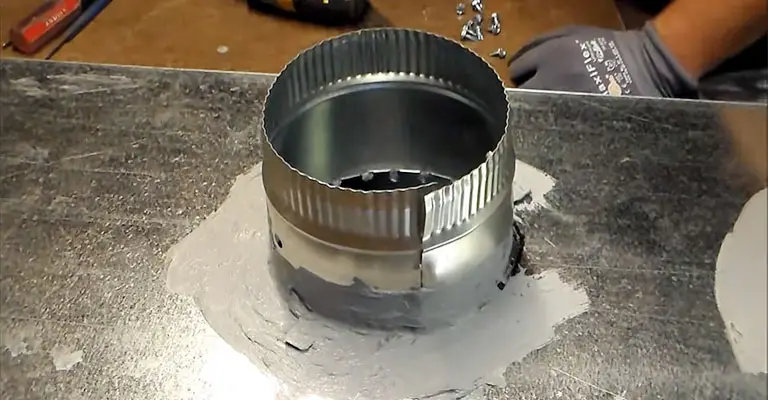
You probably won’t have any problems adding a duct run and vent if your upstairs bathroom is freezing in winter and you’d like to get more heat into it.
The answer is yes, you can easily utilize your existing ductwork to heat all the rooms in your home if your HVAC and ductwork system is a little (or a lot) too large.
Frequently Asked Questions
1. Can screws be inserted into ductwork?
Using screws in existing ductwork is possible. You can screw into ductwork easily when you push the screws attached to the drill bit.
2. How much does it cost to add vents to existing ductwork?
The cost to add vents to existing ductwork depends on the material and accessibility of the vents as to how much they cost. Adding vents, however, can take between $250 and $1,000.
3. Is it difficult to add a vent to the existing ductwork?
There is no problem adding a vent to your existing ductwork. In fact, you can do it yourself if you follow the instructions. What is even better is that you won’t need professional help.
Final Words
Adding ducts to an existing system in South Carolina or anywhere else requires careful consideration to ensure the seamless operation of your air conditioning unit and heat pump. It’s paramount to align the new flex duct properly to prevent negative pressure that can hamper indoor air quality. An effective addition means cooler air in the right places, an efficient return air mechanism, and a well-functioning air handler. Also, one must pay special attention to the correct alignment of screw holes and securely fastening the vent’s nuts to avoid any issues down the line.
It’s not just about adding ducts; it’s about enhancing the efficiency and the longevity of your entire HVAC system. If done correctly, homeowners can experience improved air circulation, better control over indoor temperatures, and overall a more comfortable living space. Remember, it’s always advisable to consult with professionals before making changes to ensure that your existing system functions at its optimal best. Whether you’re in South Carolina or elsewhere, ensuring proper air flow and maintaining the integrity of your system should always be the top priority.


