How Do You Attach a 2×6 to Notched 6×6 Post?
The topic of this blog post is how to attach a 2×6 board to a notched 6×6 post. We will go over the tools and materials needed, the steps involved in measuring and cutting the notches, and the process of attaching the 2×6 board to the post.
Attaching a 2×6 board to a notched 6×6 post is an important step in building a sturdy and stable structure. The 2×6 board will serve as a support for the perimeter of the gazebo, while the 6×6 post provides a strong foundation for the entire structure.
By properly attaching the 2×6 to the post, you can ensure that your structure will be able to withstand various types of weather conditions and will last for many years.
In this post, we will discuss the tools and materials required for this project, how to measure and cut the notches in the 6×6 post, and the steps involved in attaching the 2×6 board to the post.
We will also discuss how to support the 2×6 and provide tips and tricks for getting a secure and tight fit. The post will be useful for DIY enthusiasts, builder and carpenter, and even Home owners.
How Do You Attach a 2×6 to Notched 6×6 Post?
The post will be illustrated with pictures and drawings to make it easy to understand and follow.
Tools and Materials Needed
The tools and materials required for this project include:
- 6×6 pressure-treated posts
- 2×6 board
- Measuring tape
- Speed square
- Circular saw or hand saw
- Chalk line
- Drill
- 3/8″ or 1/2″ carriage bolts
- Washers
- Nut drivers or wrenches
- Safety goggles and ear protection
- Dust mask
- Blocking (if needed)
These tools and materials can be purchased at a home improvement store or a lumberyard. Many of the tools can also be rented if you don’t want to purchase them. You can also check online or second-hand stores for used tools or materials.
Safety precautions are extremely important when working with power tools. Always wear protective gear, such as safety goggles and ear protection, and use a dust mask to avoid inhaling sawdust.
Keep fingers and loose clothing away from the saw blade at all times. Follow all instructions on the tools you are using and take the time to understand their proper use. Always make sure you have a clear and stable work surface.
Measuring and Cutting
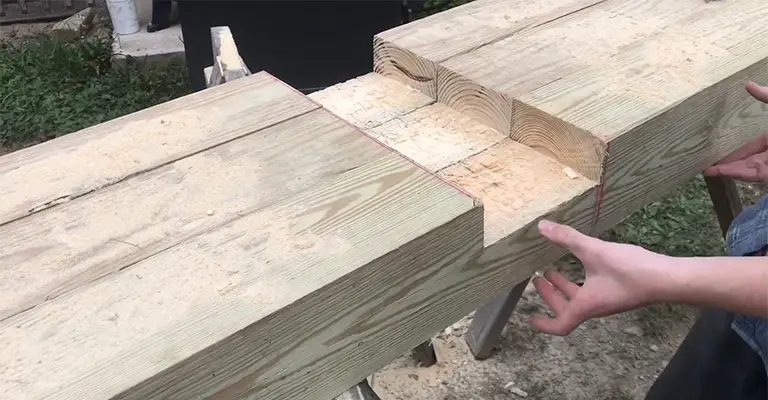
a. To measure and mark the notches on the 6×6 post, you will need to first determine the width of the 2×6 board that will be attached to the post. Measure the width of the 2×6 and mark it on the 6×6 post using a speed square and a pencil.
Then, using the chalk line, draw a line to indicate the depth of the notch. The depth of the notch should be equal to the thickness of the 2×6. Make sure to mark the notch on both ends of the post.
b. Once the marks are made on the post, it’s time to make the cuts. You can use a circular saw or a hand saw to make the cuts. When using a circular saw, set the blade depth to the appropriate size for your cuts and make sure that the saw is level. When using a hand saw, you will want to use a steady hand and make sure you are cutting straight.
c. To ensure accurate cuts, it is important to use a combination square or speed square to ensure that your marks are at a 90-degree angle to the post. Make sure to double-check your measurements before making the cuts and take your time when cutting. This way you will be less likely to make mistakes and will have a better chance of getting a clean, accurate cut.
Tips: Use a straight edge or saw guide to keep your saw cut straight -Use clamps or wood blocks to hold the wood securely while you make the cuts
- When working with pressure-treated wood, it is a good idea to wear gloves and long sleeves to protect your skin.
Attaching the 2×6 to the Notched Post
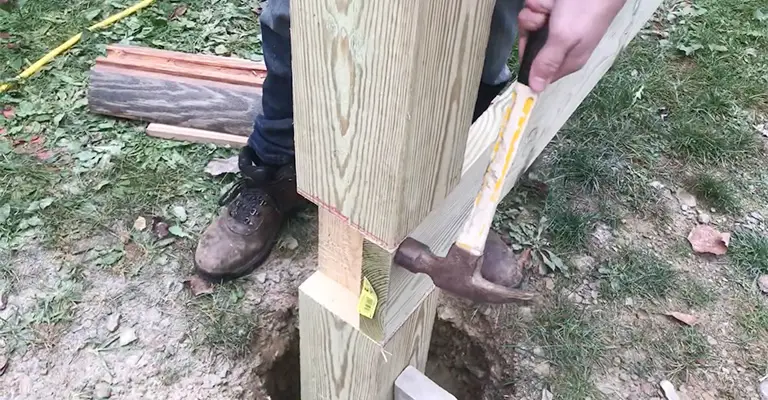
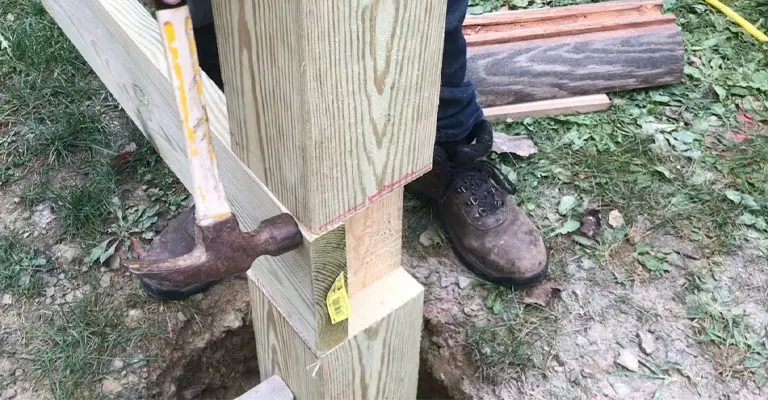
a. There are several different types of fasteners that can be used to attach the 2×6 board to the notched 6×6 post. Carriage bolts are one of the most popular options.
These bolts have a square shoulder that keeps them from turning while they are tightened.
Other options include lag screws or structural screws, but carriage bolts are generally preferred because they provide a more secure connection.
To attach the 2×6 to the notched post using carriage bolts, you will need to drill pilot holes through the 2×6 and into the 6×6 post.
The pilot holes should be slightly smaller in diameter than the carriage bolts. Next, place a washer on the bolt and insert it through the pilot hole in the 2×6 and into the 6×6 post. Tighten the nut on the bolt using a nut driver or wrench to secure the 2×6 to the post.
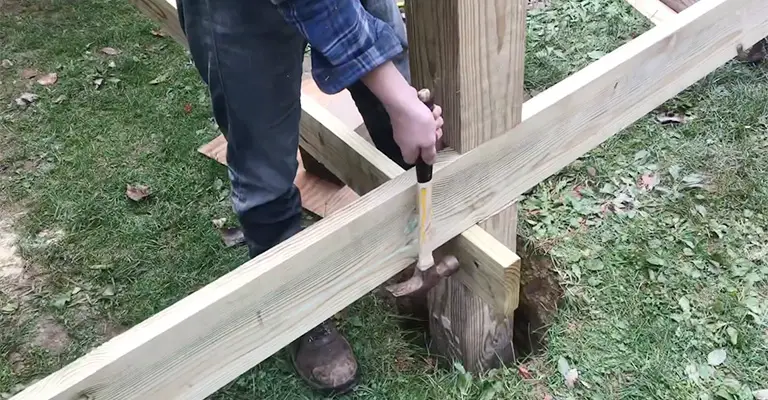
c. To get a secure and tight fit, it is important to make sure that the notches in the 6×6 post are a snug fit for the 2×6 board. Use a level to ensure that the 2×6 is plumb and make any necessary adjustments before attaching it to the post.
When attaching the 2×6 board to the post using carriage bolts, make sure to tighten the nut firmly and make sure the 2×6 is not shifting.
Tips
- It’s a good idea to use a level to make sure the 2×6 is level and flush with the top of the post before attaching.
- You can also install the 2×6 by applying a bead of construction adhesive to the notch before installing the board, this will make the board more secure.
- You can use a hammer to tap the board in to place in the notch, also make sure it is level, plumb and flush with the top of the post.
- If possible, it’s best to attach the 2×6 board before installing the posts, so you can make any necessary adjustments.
Attaching the 2×6 to the Notched Post
a. There are several different types of fasteners that can be used to attach the 2×6 board to the notched 6×6 post, the most common are:
- Carriage bolts, are one of the most popular options. These bolts have a square shoulder that keeps them from turning while they are tightened.
- Lag screws, these are heavy-duty screws that are inserted through the 2×6 board and into the 6×6 post. They are often used in outdoor applications because they are resistant to corrosion.
- Structural screws, these are similar to lag screws, but they are designed specifically for structural applications. They are typically made from a stronger, more durable material than regular wood screws and are designed to hold more weight.
b. To attach the 2×6 to the notched post using carriage bolts, you will need to drill pilot holes through the 2×6 and into the 6×6 post. The pilot holes should be slightly smaller in diameter than the carriage bolts. Next, place a washer on the bolt and insert it through the pilot hole in the 2×6 and into the 6×6 post. Tighten the nut on the bolt using a nut driver or wrench to secure the 2×6 to the post.
To attach the 2×6 using lag screws, you will need to drill pilot holes through the 2×6 and into the 6×6 post. Then, insert the lag screws into the pilot holes and use a wrench or impact driver to tighten them.
To attach the 2×6 using structural screws, you will need to drill pilot holes through the 2×6 and into the 6×6 post. Then, insert the structural screws into the pilot holes and use a wrench or impact driver to tighten them.
c. To get a secure and tight fit, it is important to make sure that the notches in the 6×6 post are a snug fit for the 2×6 board. Use a level to ensure that the 2×6 is plumb and make any necessary adjustments before attaching it to the post. When attaching the 2×6 board to the post using any fasteners, make sure to tighten the connections firmly and make sure the 2×6 is not shifting.
Tips:
- When drilling pilot holes, keep the drill at a slight angle (about 15 degrees) towards the edge of the 2×6, this will prevent the wood from splitting.
- Use construction adhesive in addition to the fasteners, this will make the connection stronger.
- When working with pressure-treated lumber use hot-dip galvanized or stainless-steel fasteners to prevent corrosion.
Supporting the 2×6
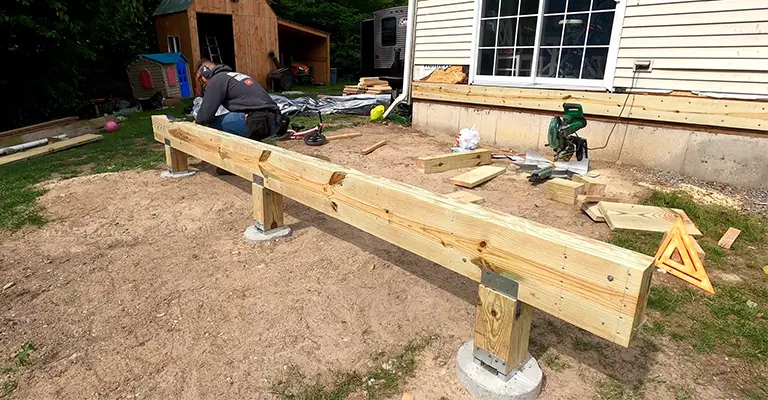
a. Blocking between the floor joints is an important step in ensuring the proper support for the 2×6 board. The blocking helps distribute the weight of the structure evenly across the floor joists and prevents the 2×6 from sagging or twisting over time. Blocking is typically installed perpendicular to the 2×6 and the floor joists, and it is placed at regular intervals along the length of the 2×6.
b. To install blocking, measure and mark the location of the blocking on the 2×6 board and on the floor joists. Then, cut the blocking to size. You should use the same material as the floor joists, 2×6, 2×8 or 2×10. Next, apply a bead of construction adhesive to the top and bottom of the blocking, and insert it into the space between the 2×6 and the floor joists. Secure the blocking in place by driving nails or screws through the blocking and into the floor joists.
c. To ensure proper support, make sure to install blocking at regular intervals along the length of the 2×6. Use a level to ensure that the blocking is plumb and make any necessary adjustments before securing it in place. To make sure that the blocking is secured properly, you should use a framing hammer or a framing nailer. This will ensure that the blocking is held in place securely and does not move over time.
Tips: -When installing blocking, Make sure to maintain the same spacing between blocking and joists, this will ensure even weight distribution.
- You should use galvanized or stainless-steel fasteners to prevent corrosion when working with pressure-treated lumber.
- You should also install blocking at the corners of the gazebo, where the 2×6 meets the
Frequently Asked Questions
What type of wood can I use instead of pressure-treated 6×6 posts?
You can use naturally rot-resistant woods like cedar or redwood, or even use metal post.
Can I use other types of fasteners instead of carriage bolts?
Yes, you can use lag screws or structural screws, but carriage bolts are generally the most popular and effective choice for attaching a 2×6 to a notched 6×6 post.
Do I need to paint or stain the wood after installation?
For pressure-treated wood, it is recommended to wait at least six months before painting or staining it. This will allow the wood to dry and to stabilize. For other types of wood, you may want to stain or paint it to protect it from weathering and decay.
Do I need to anchor the gazebo?
The gazebo’s weight, the wind loads and the potential soil conditions of the location would determine the need of anchoring the gazebo. It is important to consult with building codes or a professional to determine if anchoring is necessary.
Can I use 4×4 posts instead of 6×6 posts?
A 4×4 post is not a good option for this type of construction and it is not code compliant. 6×6 posts have a much greater capacity to carry the weight of the structure and to resist wind.
Conclusion
In this post, we covered the steps involved in attaching a 2×6 board to a notched 6×6 post for a gazebo structure. We discussed the tools and materials needed for the project, the process of measuring and cutting the notches, and the steps involved in attaching the 2×6 board to the post.
We also discussed the importance of using blocking between the floor joints to provide additional support and explained different types of fasteners that can be used.

