How to Install Windows With Foam Board
Foam boards ease windows installation. Firstly, install the insulating board and backdam before applying adhesive. Then, before installing the window pump, apply sealant at the jamb. Lastly, tape the head flashing. This article will guide you on how to install windows with foam board.
The Process | How to Install Windows With Foam Board
Foam board is an excellent window material since it is cheap, easy to work with, and can be trimmed to fit any size window. Foam board is a great way to make a robust platform for your windows, and it’s easy to adjust to fit the size of your windows.
In most wall assemblies, the connecting details around windows have been the source of the most problems with water penetration into the structure. The following are instructions on how to put a window into a wall using foam board.
Insulating board on the wood-frame wall
The joints between the boards must be sealed for the foam board to be an efficient air barrier and drainage plane. Even if all of the connections are sealed, having a vertical sheathing joint over a window head is not recommended. This should be considered while laying out the sheathing board over the wall area.
Install backdam
Any water that leaks through or around the window should be directed back to the exterior using a back dam.
Apply adhesive-backed sill flashing
An adhesive-backed sill flashing should be put to shield the rough opening from moisture while also maintaining the air barrier between the wood framing and the sheathing. The sill flashings must extend out to the outer face of the sheathing because the exterior face of the foam insulation doubles as a drainage plane.
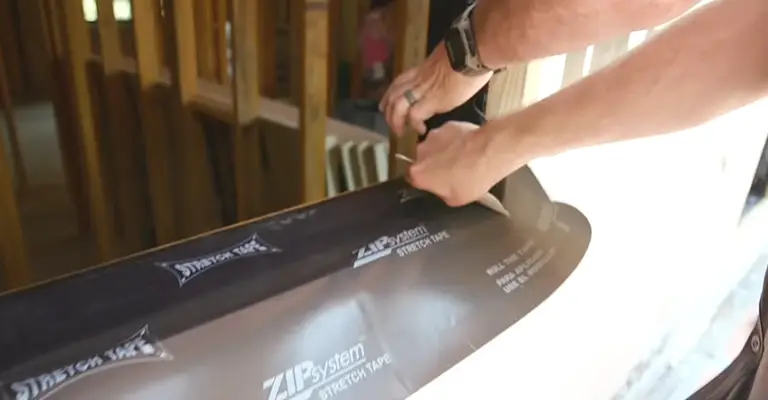
Install adhesive-backed jamb flashing
To avoid a reverse flashing problem, the adhesive-backed jamb flashing is put next, with the joints shingle-lapped.
Apply sealant at jambs and head
To form a seal behind the nailing flanges of the window, the sealant is put behind the nailing flanges at the head and jambs. To allow the cavity beneath the window to drain to the outside, the sill is left open.
Install window plumb, level, and square
Install the window according to the manufacturer’s instructions. Between the wood rough opening and the window frame, shims and setting blocks should be inserted (the window should not bear on the foam sheathing). The window must be secured to the rough opening in the wood.
Install drip cap (if applicable)
install flashing headlights Because the nailing flange at the window head might operate as a reverse flashing, directing the water into the interior, it’s critical to install a drip cap (if necessary) and head flashing. Create a reglet for the drip cap in the face of the sheathing above the window head for added protection.
Install jamb flashing
To prevent water infiltration from the outside, the flashing should be put over the nailing flanges of the jambs. The sill is not sealed, enabling water to escape back to the exterior through the rough aperture.
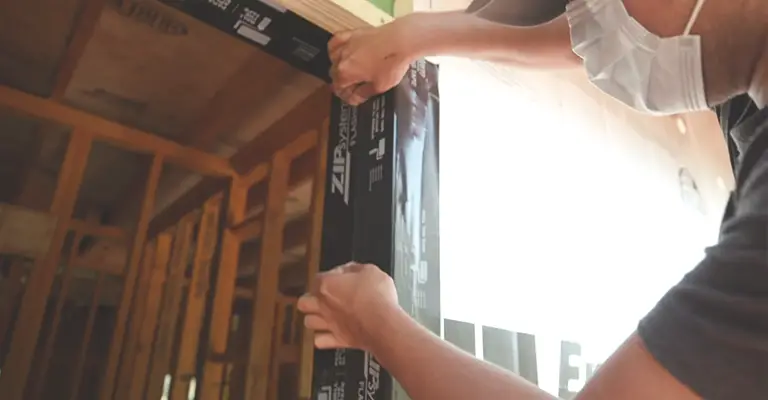
Tape head flashing
To complete the air seal between the wall system and the window frame, apply interior sealant or non-expanding foam around the whole perimeter of the window. It’s important to make sure the foam doesn’t obstruct the drainage from the sill rough hole to the outside.
Installing Windows With Foam Board | What You Get
It’s quite always beneficial for you to install windows with foam board.
More effective insulation
Rigid foam sheathing has substantially better insulation per inch than other materials. Especially for other materials with R-values ranging from 3.6 to 8.0. (i.e. The R-value of plywood is 1.25, while the R-value of fiberglass batts is 3.14.).
In places with particularly cold or damp climates, this is especially important for preventing damage (such as mold and rot) to frames and walls.
Better at controlling moisture
Moisture control is improved. When it comes to moisture control, the stiff foam serves two purposes. It shields the wood sheathing or structure from rain or water seeping in through the siding. In the winter, it warms the interior sheathing or framing sufficiently to prevent moisture buildup from the heated interior air.
Better at preventing air leaks
Moisture management has improved. Rigid foam has two purposes when it comes to moisture management. It shields the wood sheathing or structure from rain or water seeping through the siding. In the winter, it warms the interior sheathing or framing sufficiently to prevent moisture accumulation from the heated interior air.
Installing Windows With Rigid Foam | What You Lose
Using rigid foam boards might be uneconomically dependent on your circumstances.
Must be installed properly to limit air
Rigid foam does not require specific equipment to install, but precise seam-sealing processes must be followed to satisfy code.
Less structural strength than plywood
This isn’t an issue if rigid foam sheathing is utilized on top of wood sheathing. If you wish to use stiff foam instead of wood sheathing, you’ll need more bracing to keep it from racking.
Slightly more expensive
The cost of the project will rise if a layer of firm foam is added on top of plywood or OSB sheathing. This is, however, a one-time, set expense. Rigid foam often pays for itself in the long run by lowering utility expenditures. It may also delay or prevent costly repairs to rotted walls or framing.
FAQ
- Do you need house wrap over foam board?
Ans: The answer is a resounding yes. When the two materials are used together, your home becomes extremely well-insulated against outside wind and weather. If you use stiff foam to install house wrap, it should go under the insulation rather than around it.
- How do you attach foam boards?
Ans: You can use screws with large washers, a special glue intended for bonding foam board insulation, or caulk or spray foam to seal in smaller pieces of insulation.
- What is the R-value of 1 foam board?
Ans: The R-value of foam board insulation varies depending on the kind, however it ranges from 3.6 to 8.0 per inch of insulation thickness. Polyurethane, polyisocyanurate, extruded polystyrene foam, and expanded polystyrene foam are all examples of foam board insulation.
- Which side of foam board insulation faces out?
Ans: Consider whether you want to make the space inside warmer or cooler when deciding whether to put the foil side of the foam insulation board shiny side in or out. If you want to make the space warmer, turn the foil inside out so that radiant heat can be reflected into the space.
Last Words
To make the ultimate decision about your home, however, you can rely on the counsel of your specific contractor. Some builders argue that homes with “picture frame” windows, which are framed with strapping lumber before being placed, should have foam board insulation added first, followed by the house wrap.


