Proven Techniques to Effectively Remove Soap Scum from Your Home
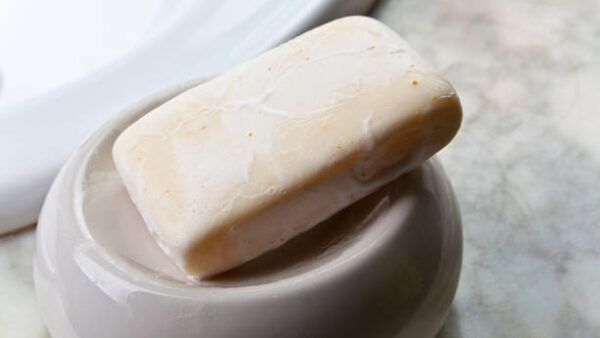
As we all lead busy lives, tackling household chores such as removing soap scum can be a daunting task. However, it’s essential to maintain a clean living environment for health and wellness. This article will discuss the most effective methods to remove soap scum and keep your home sparkling clean.
Soap scum – the pesky, chalky white film that often coats bathtubs, showers, and sinks – can be frustrating to deal with. It results from the reaction between soap and hard water, creating a stubborn residue that can be hard to remove. However, with the right techniques and products, removing soap scum can be a breeze.
Start With Household Basics
For an environmentally friendly and inexpensive solution, look no further than your pantry. A simple mixture of equal parts white vinegar and dish soap is an effective solution for tackling soap scum. Vinegar, known for its acidic properties, can break down soap scum, while dish soap adds cleaning power and creates a manageable consistency.
Apply the mixture to the affected area and let it sit for 15 minutes before scrubbing with a non-abrasive brush or sponge. Rinse well with warm water and dry the area thoroughly to prevent water spots and further soap scum build-up.
Use Specialty Cleaning Products
There is an array of products on the market designed specifically to remove soap scum. These products often contain surfactants and acids that work to break down and dissolve soap scum, making it easier to wipe away. Always follow the manufacturer’s instructions when using these products, ensure adequate ventilation, and wear gloves to protect your skin.
Invest in a Steam Cleaner
A steam cleaner is a fantastic tool that uses hot, pressurized steam to break down and lift soap scum. Not only is this method highly effective, but it’s also chemical-free, making it a great option for those with allergies or sensitivities.
Consider a Water Softener
If soap scum is a constant issue in your home, it may be worth investing in a water softener. Hard water is high in minerals like calcium and magnesium, which react with soap to form soap scum. A water softener can reduce the mineral content of your water, reducing soap scum formation.
Regular Maintenance is Key
Prevention is always better than cure. Regularly cleaning your bathroom and kitchen surfaces can prevent soap scum build-up in the first place. Dry surfaces after use and consider using a daily shower spray to keep soap scum at bay.
While these methods are incredibly effective, it’s essential to know that not all surfaces respond to cleaners in the same way. Always test a small, inconspicuous area first before applying any cleaner, homemade or commercial, to a larger area.
Expert Tips for Dealing with Soap Scum
Understanding the nature of soap scum is key to knowing how best to tackle it. The sticky substance is a combination of soap and hard water deposits, and these deposits are what give soap scum its stickiness and make it so difficult to remove.
Don’t Underestimate Natural Ingredients
Your pantry may hold the key to your soap scum struggles. Baking soda and vinegar together create a powerful, natural cleaner that can tackle stubborn soap scum. Make a paste from equal parts of vinegar and baking soda, apply to the affected area, leave for 15 minutes, and then scrub away with a soft brush.
Essential Oils can Help Too
Adding a few drops of essential oils like tea tree, lemon, or lavender to your homemade vinegar and dish soap solution can boost its effectiveness. These oils have strong antimicrobial properties that can aid in the removal of soap scum while leaving your bathroom smelling fresh and clean.
Use a Scraper
Sometimes, the soap scum can be so hard and thick that it requires more than just a cleaning solution. A plastic scraper can help remove hardened soap scum without scratching your surfaces. But remember to use it gently to avoid any potential damage.
The Power of a Magic Eraser
Magic Erasers are wonderful tools in the battle against soap scum. These dense sponges have a micro-abrasive surface that can scrub away soap scum without causing damage. Just wet the eraser, squeeze out the excess water, and scrub away.
Tackle Your Shower Curtains
Don’t forget your shower curtains. Soap scum can build up on them too, making them look dirty and uninviting. Most fabric and plastic shower curtains can be cleaned in the washing machine with regular detergent and a few old towels for added agitation.
The Importance of Routine
Creating a regular cleaning routine can prevent the build-up of soap scum. Wiping down your surfaces after each use can go a long way in preventing soap scum from forming in the first place.
Conclusion
A spray bottle is a useful tool in the mission to remove stubborn soap scum, especially from shower doors and bathroom surfaces. Fill it with a solution of equal parts vinegar and dish detergent or your chosen best soap scum remover. The convenience of a spray bottle makes application easy and allows for even distribution of the cleaner, particularly on vertical surfaces like shower walls and glass shower doors.
Bar soap, while practical, can often contribute to the build-up of soap scum. If you’re finding it difficult to keep your shower doors and bathroom surfaces clean, consider swapping out bar soap for shower gel or liquid soap. These alternatives often leave less soap scum residue behind, reducing the overall cleaning required. But, if soap scum stains are still a problem, a baking soda paste can be a safe and effective solution to remove the thick soap scum.
In your quest to tackle soap scum, it’s crucial to find the best soap scum removers that suit your cleaning needs. Options range from commercial products to homemade solutions such as the vinegar and dish detergent mix. For challenging areas, like shower door tracks or textured glass doors, a soft toothbrush or sponge combined with the cleaner can work wonders. Remember to always test any cleaner in a hidden area first, and mix your solutions in a plastic bowl to avoid any unwanted reactions with metal containers.

