How to Cut Vinyl Plank Flooring With a Miter Saw
Unless you have several air vents to work with that require small holes right in the middle, a miter saw is all you need to cut vinyl plank flooring. It all boils down to how you take the measurements and how good you are with using the miter saw.
But before you start, keep in mind that it will produce small vinyl chips, resulting in a somewhat messy workplace. However, these chips are larger than sawdust, and using a vacuum cleaner will help you get rid of them.
Can You Use Miter Saw to Cut Vinyl Plank Flooring
Yes, you can, but not without the help of other cutting tools. That is to say, though using a miter saw is a viable option for cutting vinyl plank flooring, it can be a hit and miss. For example, you’ll have to struggle with small holes or tight curves, whereas getting crosscuts is no big deal.
Also, a miter saw works on a principle that requires the blade to be pushed down toward the object. Therefore, it will drop a sweat if you intend to get longitudinal rip cuts. But except for that, cutting vinyl plank flooring with a miter saw is very much doable, if not a smooth sail.
How to Cut Vinyl Plank Flooring With a Miter Saw
Like regular wood and MDF, vinyl plank cuts pretty easily, without much elbow grease. That being said, you can get decent cross cuts through snaps and scores. However, if you’ve got a large project in hand, snapping and scoring will take a lot of time and effort. But with a miter saw, the flooring will be complete in a snap.
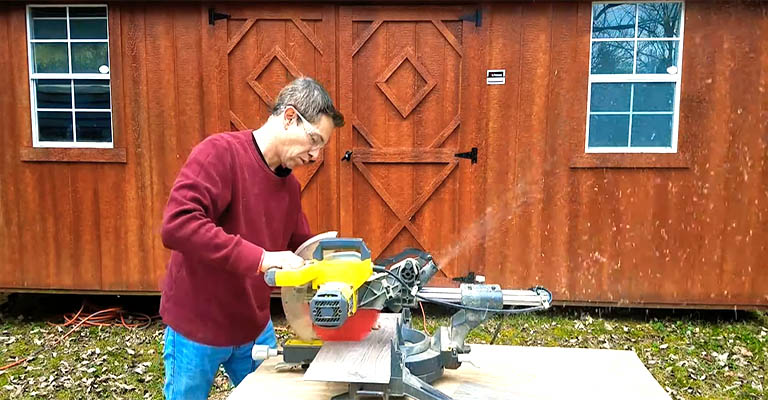
When installing vinyl plank flooring, you will run into several obstacles that require the planks to be cut in different ways.
Cutting to Length
No matter your project size, you will be cutting the planks to length more than any other cuts. There will always be a tiny spot at the end of each row that doesn’t require a full-length plank.
First off, use a measuring tape to get the length of the left-out spot. And for the expansion gap, follow the minimum recommended by the manufacturer. Usually, they suggest a ¼-inch gap though it may vary depending on the material.
You can also put the plank in the orientation you wish it installed and then flip it around to mark the cut. Once you’ve got the marking, you can straight up use the miter saw to cut the plank. Beware that the layer underneath the plank might still be attached. However, you can use a knife or blade to detach it.
Cutting to Width
Unlike lengthwise cuts, you won’t find the need to cut to width as often. For example, you will only need to cut to width at the beginning of the project and perhaps in the end. But cutting the board down the length is easier said than done, not with a miter saw, fortunately.
To get a clean cut and keep the surface underneath safe, you might want to use a backer with a 1-inch rigid foam or anything similar. Plus, it will be wiser to clamp the board down so it does not move while cutting.
After that, you’re all set to start cutting from one end to another with the miter saw. But make sure the blade is set to adapt a little bit below the diameter of the piece, so it gets as little exposed as possible.
How Do You Cut Vinyl Flooring Around Objects
While cross cuts are pretty convenient, cutting around objects can be tricky. Unless the room you’re working on is a perfect rectangle, there will be bumps and walls that stick out. There are two types of cuts you will have to make in such cases.
Corner Notches
If there’s a small bump on the wall, you have to cut the first portion to length. For the measurement, flip it around and go all the way to the wall. But avoid going straight up against the bump to make sure you don’t cut it too short. An easy way is to go against the wall and pull the board ¼ of an inch back to make a mark.
Besides, you have to mark the length alongside the width of the notch. So, line it directly with the end where you will install it and leave about ¼ inches before making the mark. Then, bring back and place it in line with the piece, again keeping that ¼-inch gap while marking. Lastly, draw straight lines and connect them.
Next, make the cuts along the lines using your miter saw. Once you’ve linked the two cuts together, you can put the plank in place to check if it fits right with the notch.
Side Notches
Side notches are the ones that require you to cut an opening right in the middle of the board. For example, there might be a scenario where you have an opening in a closet and need to go around that.
To begin with, align the plank where it will get installed and mark the width of the notch. And for the depth, measure it from the edge of the top, where it will connect. Avoid the common mistake of measuring from the edge of the groove. In the end, lay the lines out to establish where the cut will go.
Now, start cutting the opening from the edge of the board and slowly move in. At this stage, you have to make cuts from the inside, which can be difficult with a miter saw. However, you can make tiny relief cuts and eventually get to the point where the notch becomes apparent. For convenience, you may use a jigsaw at this point.
How to Cut Curves in Vinyl Plank Flooring
The chances of running into curves are minimal unless you have a column in the middle of the room or a toilet flange in a bathroom. It can be tricky if you don’t have a contour gauge. That is because a contour gauge will let you measure the curve precisely.
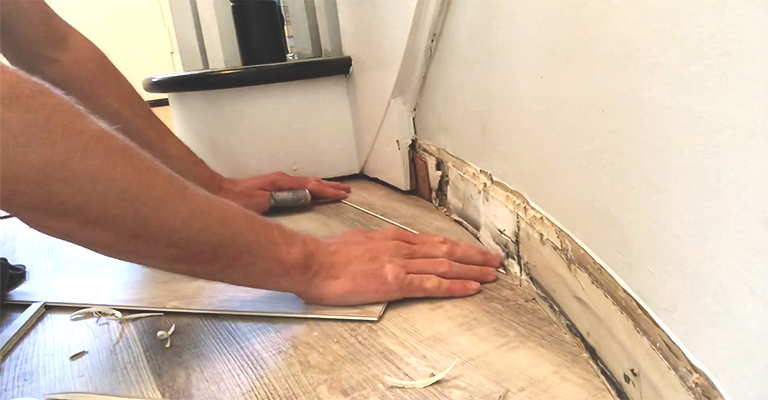
After getting the measurements, draw the curve on your plank and cut using the miter saw. Always remember that you can increase the curve if you undercut but never decrease once you’ve got it too wide.
Frequently Asked Questions
Q: What saw blade to cut vinyl flooring?
A: While using a miter saw for vinyl plank flooring, the blade must be a fine-toothed round cutting disc. And by fine-toothed, we mean those thin kerf ones that consist of 80 to 100 carbide-tipped teeth.
Q: Can you use a miter saw on the floor?
A: Although not recommended, using a miter saw on the floor should be okay for the most part. However, you won’t get as efficient of a workflow that a mounted miter saw provides, not to mention the damage caused by the vibration. Plus, slicing through long planks and getting a clean cut will be a pain in the neck.
Final Words
If you have a miter saw lying around, you don’t need to spend on a new jigsaw or multi-tool. With a bit of skill, you can cut vinyl plank flooring like Armstrong, Flooret, Forbo, Vesdura vinyl planks, and many other brands with a miter saw and get better efficiency than snapping and scoring. But no matter what, never forget to put safety glasses on while working with a miter saw.
Mastering the technique of cutting vinyl planks with a miter saw is essential for a successful vinyl flooring project. The precision offered by a miter saw ensures that each piece of your laminate flooring fits perfectly, enhancing the overall look and durability of the floor. Remember, whether you are working with standard or thicker vinyl planks, a miter saw equipped with a sharp blade is key to achieving clean, precise cuts. This not only simplifies the installation process but also helps maintain the integrity of the vinyl material.
Furthermore, the versatility of a miter saw extends beyond cutting vinyl flooring planks. For intricate shapes or smaller adjustments, a utility knife can be used to easily cut vinyl flooring sheets, offering flexibility in your approach. This combination of tools ensures that you can tackle any challenge that comes with installing vinyl flooring. With the right techniques and tools, such as a miter saw and a utility knife, your DIY vinyl flooring project will not only look professional but will also stand the test of time.

