How To Fix A Shower Knob That Keeps Turning?
A striped shower knob can be a frustrating problem. But it’s not impossible to fix. If it is a knob on a shower head or faucet, the problem will likely be a worn-out washer.
The washer can be replaced by unscrewing the knob and removing the old one. To buy a new washer, you will need to know the size of the hole in the knob. Before you do anything, look at the shower knob to see if the parts are just loose or if they’re stripped too.
If the parts are just loose, tighten them with a screwdriver or pliers. If they’re stripped as well, read on for instructions on how to fix them. This guide will show you how to fix a stripped shower knob.
What Is Causing My Shower Knob To Keep On Turning?
This is a very common problem, and there are plenty of reasons why it might happen. For example, there might be a few reasons why your shower knob does a mini-ballet dance whenever you turn on the water.
It is possible that a faulty handle is to blame in some cases. Over time, plastic knobs on shower faucets are susceptible to damage. Cracks in the handle prevent it from providing the tension necessary for turning on the water. The handle needs to be replaced if this is the problem.
Some knobs spin freely at their axis because parts are stripped. The entire valve will have to be replaced if this happens. For example, a shower valve stem can’t usually be replaced by itself; you’ll need to replace the whole valve.
Shower Knob Spinning? Here’s How To Fix It
Now that we’ve addressed the problem’s possible causes, let’s move on to fixing it. The fix is fairly straightforward if the handle is faulty. Alternatively, the repair is more complicated if the valve stem is stripped. Try these fixes before calling a plumber.
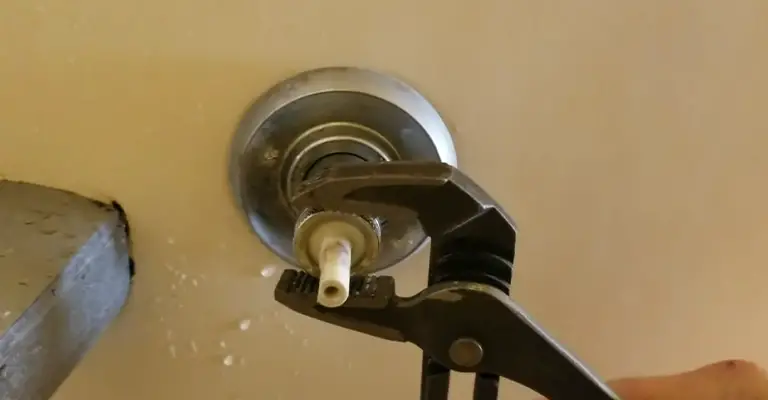
Start With A Quick Fix
It is possible to repair a shower faucet in a variety of ways. In some cases, hard water deposits may cause mineral deposits to build up behind the faucet knob. It’s a problem that can be solved.
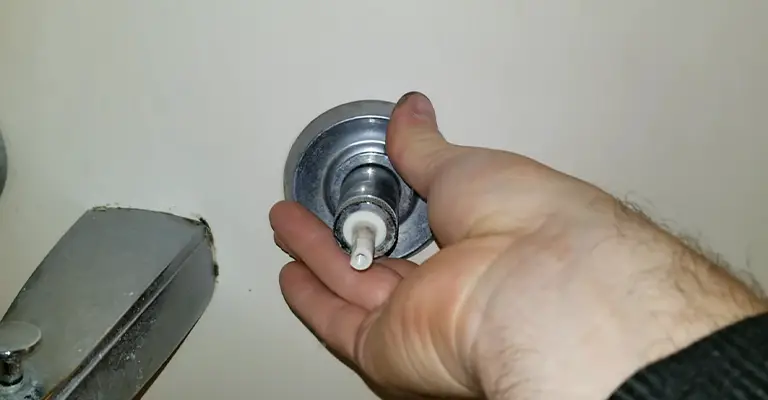
If available, turn off the water at the shower shutoff valve or your home’s main shutoff valve. You can relieve pressure in the lines by opening the shower faucet.
Covering the drain with a drop cloth protects small items from being lost. The valve cartridge can be found behind the shower handle and cover plate (if necessary). Follow these steps to remove the cartridge.
Leave the cartridge soaking in a mixture of water and vinegar for several hours after clearing away any loose debris with a soft-bristled brush.
Finally, tighten the nut on the cartridge and insert it back into the valve. Turn the water back on after replacing the handle and cover plate (if necessary). You may only need to do this to fix your problem.
To fix your striped shower knob, you will likely need to replace the cartridge altogether if cleaning does not work.
Shower Valve Stem Replacement
The entire valve must be replaced if the stem is stripped and the handle spins freely. The shower’s water supply should be turned off before you begin. Sometimes, you can shut off the water directly from the shower, but if you can’t, turn off the main water supply.
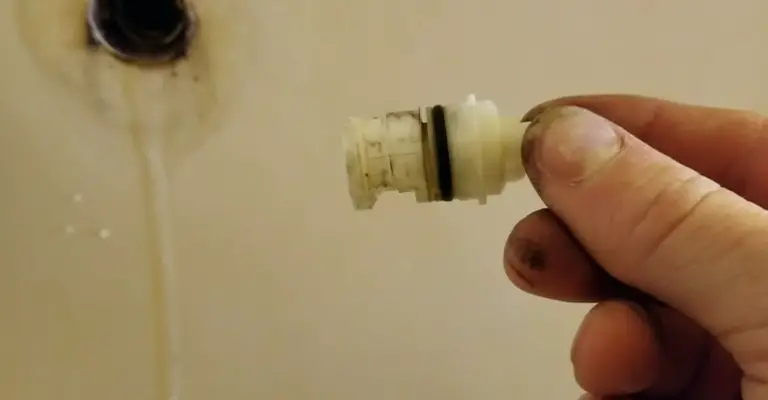
Unthread the set screw and remove it along with the handle once the water is turned off. Next, remove the valve by unscrewing the valve retaining nut. A retaining clip might need to be pried out using pliers to remove some valves, such as on a Moen shower handle.
The valve can sometimes be fixed in place by mineral deposits. To force out the valve in that case, you might need a valve remover. Rentals of these corkscrew-like devices are generally available at many locations.
A neighbor may be able to lend you one, or you may be able to buy one. In addition, you can find a replacement valve at the hardware store once you remove the valve.
An online plumbing parts supplier or the manufacturer’s website may have the replacement. In general, it takes 3-5 days for parts to arrive after ordering, but it depends on how the seller handles shipping.
As soon as the part arrives, follow the manufacturer’s instructions for installation. You should check your work after installation to ensure that the handle functions normally and that no water leaks have occurred.
Handle Replacement
Here’s how to fix the handle properly the first time if you’re committed to doing it right. Make sure the problem is with the handle first. The screw must be unthreaded and removed altogether from the valve stem.
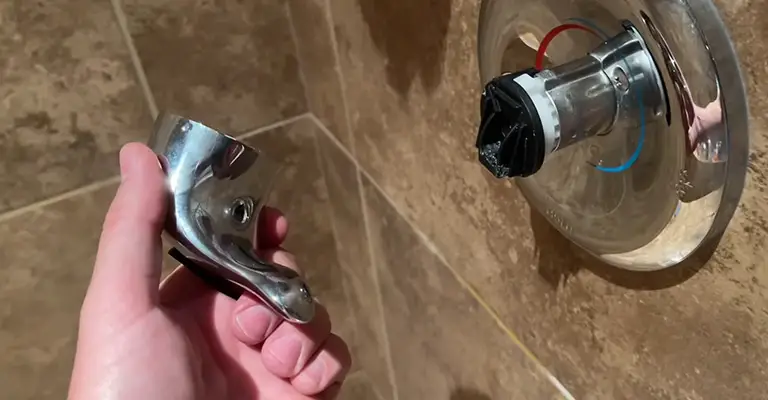
You should then inspect the handle for cracks and splits throughout. Again, there’s a good chance that the handle is responsible for the issue if you find any.
The crack can also be fixed with two-part epoxy glue if you don’t want to buy a new handle. Again, there is some strong glue here, but depending on where the crack is, it may or may not work.
After applying glue to the handle, use a C-clamp to squeeze it together if the crack is repairable. The handle should be reinstalled after it has dried completely. Remove the clamp and allow it to dry completely.
Replace the crack if it is too large to be repaired. A generic replacement may work if you can find one that matches the same brand, but it’s best to buy a matching replacement from the same brand rather than mixing and matching generic brands.
The handle can be replaced at the hardware store once the handle has been removed. Alternatively, you can order a replacement directly from the manufacturer or from an online plumbing parts retailer. Depending on the supplier, it usually takes up to 3-5 days for parts to arrive.
A Guide To Replacing the Shower Valve Cartridge
Replacing the shower valve cartridge is the best way to fix a faulty single-handle knob in your tub or shower. Make sure your shower faucet is repaired properly by following the steps below.
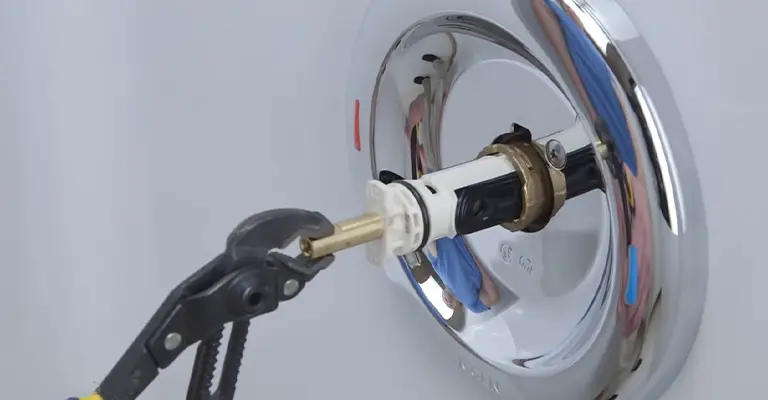
Step 1
If your shower has fixture shutoff valves, close these valves first and then open the faucet to relieve pressure.
To release pressure in the system, turn off all of the water in the house at the main shutoff valve, then open the shower faucet or another faucet that is lower than the one you are working on.
Step 2
Cover the drain with a drop cloth when working in the shower or sink to prevent any screws or small parts from falling down.
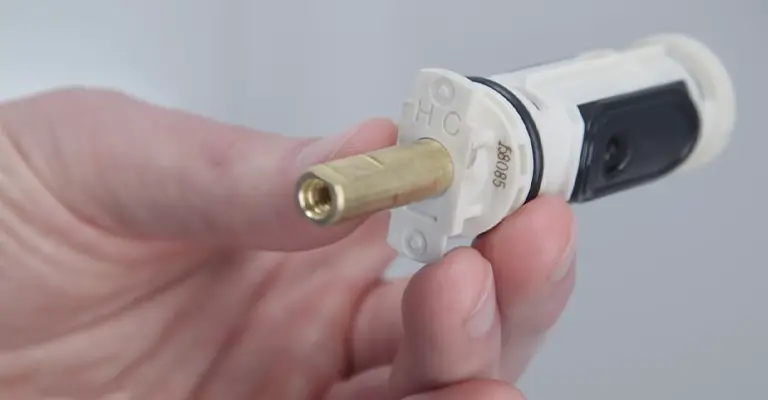
Step 3
There is usually a screw behind the cap of a single-handle shower knob that holds it on. After removing the cap, you can loosen the screw by turning the screw counterclockwise with a flathead screwdriver.
Depending on your faucet’s brand and model, you will need a flathead or Phillips screwdriver, or a hex key (also called an Allen wrench). Using a faucet handle puller may even be necessary if the knob is stuck tight.
Additional screws will attach the escutcheon plate, also called the face plate. Ensure that the caulking on the shower wall is scored with a knife if it is caulked. Once the plate is removed from the wall, you can reveal the cartridge behind it by using your flathead screwdriver.
Step 4
The faucet valve contains a replaceable cartridge. To begin, use a small screwdriver to remove the retaining clip from the top of the cartridge.
It will be useful for reinstallation if you keep this clip. Most cartridges can be removed by gripping the front of the cartridge and pulling it directly out with pliers.
Depending on the manufacturer, a cartridge pulling wrench may be necessary for cartridge removal in some cases.
Step 5
The valves on shower faucets vary according to brand and model, so they are not compatible.
By bringing your old cartridge with you to the hardware store, you can determine the exact replacement cartridge you need.
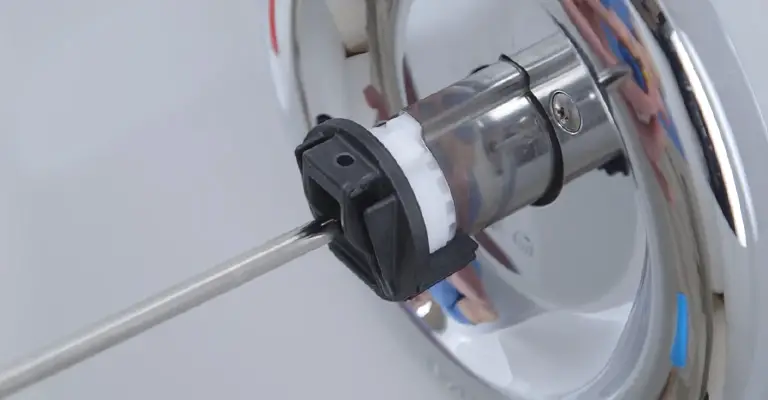
Step 6
Ensure the cartridge is properly seated in the faucet valve body and lubricate the cartridge if necessary. To secure the cartridge, slide the retaining clip into place.
Step 7
The escutcheon plate should be reinstalled if it has been removed. The handle should be reattached, the screw secured, and the cap added.
Step 8
Ensure the water supply is back on and check for leaks when turning on the faucet after inserting the new cartridge.
The Bottom Line
Replacing a shower handle is a job that is best left to a professional. The new shower handle has to be secured in place with at least two screws, and the existing shower valve also needs to be replaced.
If the installation requires any other changes, such as removing tiles or repositioning valves or handles from another model, then it is best left to professionals.

