Can You Convert A Recessed Lighting To A Hanging Fixture Light Fixture?
Here’s how to upgrade recessed fixtures into pendant lights if you like the look but are limited by the space you have. Using a conversion kit, we will show you how to transform basic can lights into dazzling pendants.
A pendant light can transform any space into a scene-stealing showpiece. You can choose from glamorous, rustic, contemporary, or other styles for these trendy fixtures.
There are, however, some homes without a pendant light. It is instead lit by recessed lights. Luckily, the problem can be fixed easily. In minutes, pendant light conversion kits can change a plain fixture into something beautiful.
There are a few differences between each kit, but we will walk you through the steps in general. Check your electrical box before starting this project and be sure you know how to turn off the breaker.
Hang Light Fixtures Up To 50 Pounds
Westinghouse recessed light kits will work with lights up to 6 inches and up to 4 inches. This converter is also capable of supporting chandeliers weighing up to 50 pounds. Furthermore, you can hang a full-sized chandelier in addition to a small pendant!
Before beginning this project, I read hundreds of reviews and was impressed by how many positive comments the kit received. It also comes with a plain white medallion that can be painted into any color you choose, which is another thing I like about the Westinghouse Recessed Light Converter Kit.
It would have been easier to use the medallion if the fixture wall hardware had covered the existing hole in the ceiling, but it could be used if necessary.
What You Need
Decorative medallion, mounting bar, round metal plate, socket adapter, and hardware (we used one from Westinghouse) for the recessed lighting conversion kit.
- Power screwdriver
- Mounting hardware and pendant light fixture
Step 1: Turn Off Power
You should turn off the power to the light you’re converting at its circuit breaker. If you touch the wires or the socket, make sure the power is out by flipping on and off the switch.
Step 2: Remove The Old Lamp
Get rid of it by removing it from the socket. Remove the decorative trim before unscrewing the lightbulb.
Consult the instructions from the manufacturer of your light fixture as needed to know how to complete this step.
Step 3: Secure The Brace
Your kit comes with a brace that you should install in the fixture. A secure bracket must have a locking bar before it can be screwed down.
Step 4: Secure Sliding Bar
Use a power screwdriver to attach the sliding bar coming with your kit to the recessed can light. The screws you use for the sliding bar must be designed specifically for this purpose.
Step 5: Install Mounting Bracket
The mounting bracket needs to be reinstalled on the fixture now that the brace and bar have been installed. In Step 3, you installed a bracket that attaches to a brace.
Step 6: Connect Wires And Cover
The ground wire should be installed with a screw. The recessed can should have it on the side. Install the mounting plate on the metal cover.
Step 7: Attach Mounting Bar
Install mounting brackets for pendant lights. If your pendant light does not come with this piece of hardware, you’ll have to purchase a conversion kit.
Step 8: Attaching The Wires
Attach the pendant light wires to the kit wires by threading the wires through the decorative medallion. Make sure you are connecting the wires according to the manufacturer’s instructions. Restore power at the circuit breaker after securing the pendant light to the socket.
Replace Recessed Light With a Pendant Fixture – DIY Method
Transform a recessed light fixture into an elegant pendant fixture for instant style in a room.
Source Materials
You will need to purchase recessed-fixture converters, ceiling medallions, and light fixtures.
Selecting The Right Recessed Lighting
Place the light fixture in the desired location. By switching off the breaker, you can turn off the power at this location.
Take Out The Recessed Fixture
The existing recessed fixture is removed by loosening clips holding the recessed light shell to the socket, twisting out the light bulb, and removing the casing. Continue to use the existing socket.
Install Recessed Fixture Converter
To install the converter, follow the installation instructions. Make sure there is no power by using a circuit tester.
Prepare New Fixture
By connecting chain links to the fixture’s cap, prepare to hang the new light fixture at the cap and the medallion center, thread wires through the fixture stem.
Connect Wiring
Connect the converter kit wires to the appropriate wires of the new fixture, following the instructions on the fixture.
Test Connection
Test that the wiring is properly connected by installing a light bulb and turning on the power at the breaker. Turn off the breaker and confirm.
Tape Ceiling Medallion
Clean-release tape is used to fix the ceiling medallion. While completing the installation of the fixture, this holds the medallion in place temporarily.
For ceiling medallions to cover the difference left by recessed fixtures, their holes are typically larger than those left by most caps. It is not necessary to use a medallion when installing ceiling-mount fixtures.
Complete Installation of Fixture
Then, attach the cap flush to the ceiling and follow directions for the specific fixture used. Tape should be removed. Circuit breakers should be turned on.
Change The Look With Decorative Trim
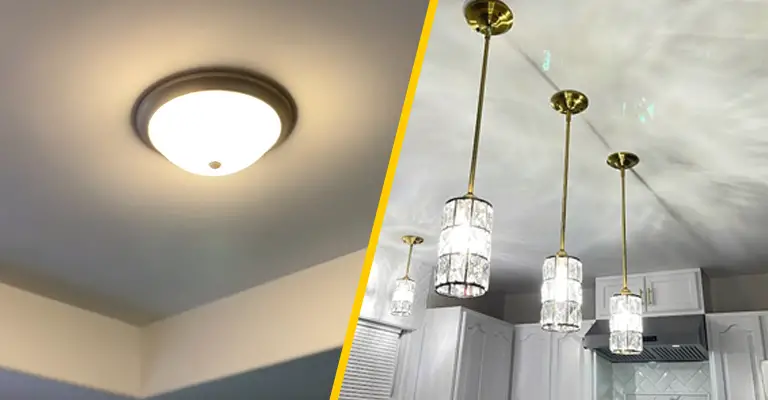
Try decorative trims that sit over recessed lights to make them appear flush-mounted ceiling lights if you want to keep the recessed lights you have but change their appearance. This allows you to experiment with different lighting styles without having to commit to a full-scale conversion.
There are many different decorative trims to choose from. This room’s ceiling is adorned with chandelier-style trim made of glass that reflects light into every corner.
Every day can light can be transformed by adding a colored-glass trim piece to deliver a soft glow. Frosted glass and hammered metal give the space a more traditional appearance.
If you choose a trim that is compatible with your current type of recessed lighting, you can select just about any shape you like. A line voltage recessed light, for example, may generate too much heat for some trims. Before you settle on trim, make sure you check your light’s parameters.
How To Install Decorative Trim?
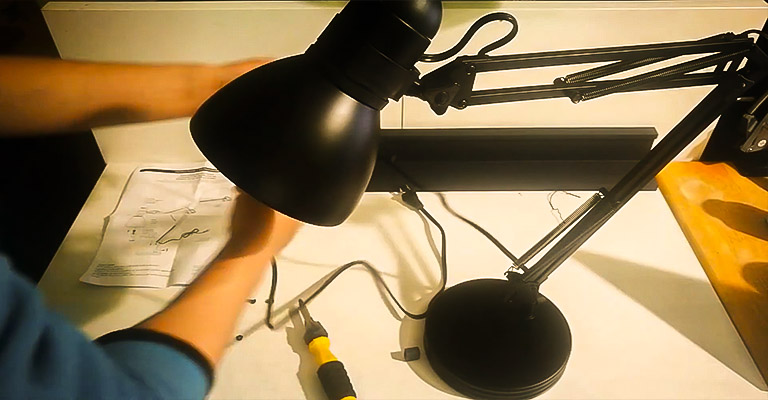
Decorative trims for light fixtures are relatively easy to install. Using a ladder and needle-nose pliers will be necessary to reach the ceiling.
Start by removing the bulb from the socket by setting up your ladder beneath the light. Find the tabs on either side of the can light that are perpendicular to each other. The bottoms of the spring stems or coil springs should be affixed to them.
Pry open the housing of your new trim and insert your pliers into the hole used to insert the spring. Follow these steps for the second spring as well. The trim will appear flush on your ceiling if you push it against it.
Changing To Standard Fixtures
Perhaps there is a kit available to help you convert your recessed lighting to a regular fixture, depending on the type. For example, new construction fixtures are bulky and have to be installed on T-bars in a drop ceiling or between joists in an attic, so converting them works well. You can easily convert them into track light.
However, you will need to do some remodeling if you want recessed fixtures instead of standard fixtures. A ceiling-mounted electrical box is needed for normal lighting. If you use a box for a ceiling fan, the process will be a lot easier.
Final Words
Converting a recessed lighting fixture into a more stylish and prominent pendant lighting can truly redefine the aesthetics of any space. While the task might seem daunting at first, with the right tools such as twist-on wire connectors and a solid understanding of the light switch mechanism, you’re well on your way to breathing new life into your interiors. Installing a new pendant light where halogen bulbs once were, allows homeowners to harness the best of both worlds: the simplicity of a light to a pendant transformation and the sophisticated allure of other light fixtures.
The process to convert recessed light to a pendant might appear complicated initially, but in reality, it’s a straightforward endeavor that many homeowners can undertake with minimal fuss. From choosing the ideal lighting fixtures that complement your existing décor to making sure the metal cover plate is securely in place, every step is crucial to ensure safety and optimal lighting.
In conclusion, if you’re considering a shift in your home’s illumination, don’t shy away from the opportunity to change recessed light fixtures. With the vast range of pendant lighting options available today, the sky’s the limit. Transforming recessed fixtures into hanging ones not only offers a refreshing change but also adds a touch of class and elegance that few other light fixtures can match. When you decide to remodel some portions of your home, for example, if you want to install recessed light in the kitchen, the kitchen island can be the right place.

